Apple and Hickory Wood Smoked Maple Infused Super Bacon

Making my own bacon has been one of the top things I wanted to try since getting a smoker. I've always craved the thick-cut, salty, and smoky flavor you'd get from the bacon served at restaurants and specialty meat delis. The regular bacon from the grocery stores cannot even compare to the taste and texture.
The reason why I never made my own bacon is because I was a little nervous of the curing process. I read about the dangers of using curing salts (sodium nitrite and sodium nitrates) and researched alternative methods that did not use them. Some restaurants, such as Burger Lounge, do offer nitrate-free bacon.
After asking around and reading articles, I've decided to just go with the sodium nitrate curing. The first reason is that vegetables actually have higher levels of sodium nitrates than the amount used for bacon. The second is that people reported non-cured bacon did not taste like bacon... and who wants that kind of taste?

Like all of my other smoked meats, I buy them in large sizes from the Costco Business Center in Kearny Mesa. The pork belly I am working with here is about eleven pounds.

The curing rub recipe and process is simple and straight forward. All you need is a lot of patience because it'll take over a week before you get to eat anything! I originally found the curing mix recipe late last year from the website Once A Chef. For whatever reason, their website is no longer around. Fortunately though, I took a screenshot of the page before it disappeared.
There are many brands of curing salts so it is extremely important to follow the instructions on the label so that you do not exceed the ingredient amount per pound of meat. Overdoing it may lead to health issues and possibly death.
Ingredients
Pork Belly
Curing Mix (per pound of meat)
- 1 Tbsp. Morton’s Tender Quick
- 1 Tbsp. Brown Sugar (shown upside down. whoops!)
- 1 Tbsp. Maple Syrup
- 1/4 tsp. Granulated Garlic
- 1/2 tsp. Cracked Black Pepper
Instructions
Rinse the pork belly in cold water and dry it with paper towels. Cut up the pork belly into smaller sized pieces and place them individually within one gallon sized ziplock bags.


Weigh each bag and then calculate the appropriate amount of the Curing Mix.

Rub the measured Curing Mix into the meat and seal the bag. Try to get as much air out as possible.

Place all of the pieces in the refrigerator and let it cure for at least seven days per inch of thickness. Flip the pieces over daily for even curing. Do not drain the liquid developing inside the bag.
After the minimum length of time has passed the meat should be firm to the touch. If it is not firm then allow another 24 hours of curing and test again.


Thoroughly rinse out each piece in cold water. Dry with paper towels. Place the pieces onto a cookie rack or similar to allow air circulation. Place into fridge for one day. Drying out the pieces on the racks will allow for the smoke to better adhere to the pieces of meat.


Prepare the smoker and wood chips. I used a combination of half hickory and half apple wood chips.
The original recipe calls for cold smoking the pork belly for several hours. Since I do not have an offset smoker I just smoked it the normal way that I do at 225 degrees Fahrenheit. I prefer hot temperatures (out of the danger zone) even though the curing process is supposed to protect the meat at the lower temperatures used in cold smoking.


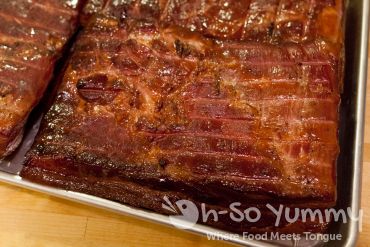
Take out the meat when the internal temperature reaches 150 degrees Fahrenheit. Allow meat to rest for half an hour or until cooled enough to refridgerate in one gallon ziplock bags.

After the meat is chilled and firm, I move on to slicing. Since I often cook a lot of meats I invested in a meat slicer. It is an absolute timer saver when you want consistent and uniform slices.
Once sliced, rebag and place into fridge until ready to eat. Freeze anything that won't be used within the next 10-14 days.
Cooking Tips:
When cooking, set the heat to medium. Slow cooking and occasional flipping of the bacon is the way to go, otherwise the high sugar content of the cure mix will burn quickly.
My trick when cooking these things on the pan is to pay attention to the amount of fat that has been rendered onto the pan. At a certain point, my pan is almost filled with grease and I know it is time to take it off and then drain the pan before starting the next batch. It always amazes me how much grease is released from these things.
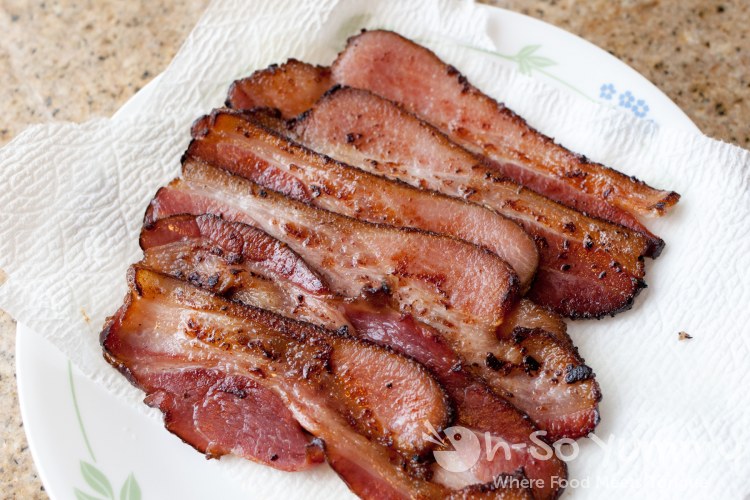
Because the meat was thick-cut the bacon did not have the typical crunchy texture or the wavy and curly appearance. Instead, you get a nice meaty bite with a slight crispy edge.

We invited several friends over and we ate roughly seven pounds worth of bacon throughout the day.


A griddle made short work of cooking the bacon compared to a pan on the stove. We strained the bacon grease to use for the eggs, hash and pulled pork. Each person was assigned a station to prepare ingredients for our breakfast. It was fabulous.

On the days that followed, we integrated bacon into everything we could touch, including burgers, mash potatoes, and even as bacon topping on ice cream! That last one didn't turn out as great as we thought...
Thanks for reading! If you've enjoyed this post please check out my other post on making Smoked Pulled Pork.


Comments
Mmm... Delicious bacon. You are wise. An 8 hour bacon fest is a genius idea. :-)
Wise and pork belly go together!
This is amazing, can't believe you made bacon from scratch Lynn! It must have made the best breakfast sandwich :)
haha, Dennis does all the work so really, it's easy for me ;)
That bacon looks fantastic YUM!!!
homemade is the best! :)
I really like how you made that so simple! Great blog! Cheer's
Add new comment