GrillGrate Review and Grilling Ribeye Steak
After many years of using porcelain coated grates on my gas grill, I decided it was time for a replacement. I will be reviewing GrillGrates, which are made in the USA and advertised to provide even heat, completely eliminate flare-ups and never rust.
Old Grates Setup
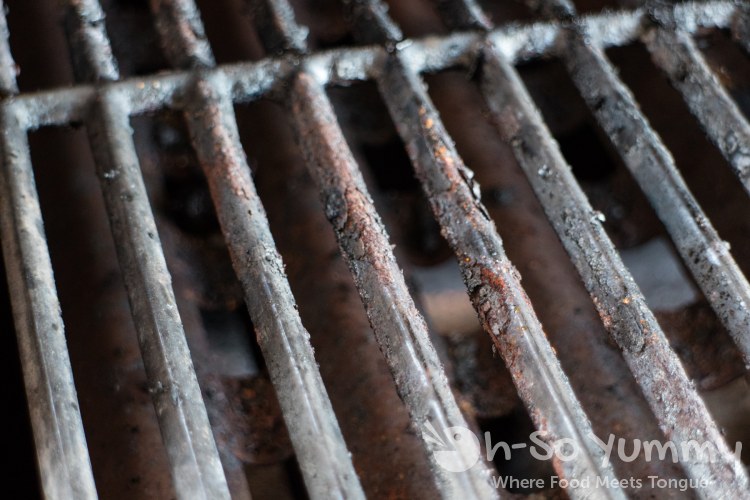
My gas grill's porcelain coated grates were starting to chip and rust. Fortunately, I already own and have been using a set of GrillGrates that I had purchased alongside my Rec Tec Pellet Grill last summer. These grates allowed me to sear meats and skewers easily on my pellet grill and gave me plenty of fantastic results.

Since the GrillGrates were specifically cut for the Rec Tec they were a bit too long for my gas grill and required me to set them horizontally on top of my old porcelain grates. With this setup, they worked like a charm and I immediately saw the benefits of using them.
- The temperature on the grilling surface was more evened out with less hotspots.
- I was able to achieve better sear marks where they were almost non-existent on my old grates.
- Most importantly, there were no flare-ups that engulfed the steaks when fat was rendered off.
New GrillGrates Setup
I loved the GrillGrates so much that I decided to buy a dedicated grate replacement set just for the gas grill. A complete set actually costs more than what I would have paid for with porcelain coated cast iron grates. But in my humble opinion I think the benefits make it worth the price and since the GrillGrates are made out of hard anodized aluminum they would not rust and should last longer.
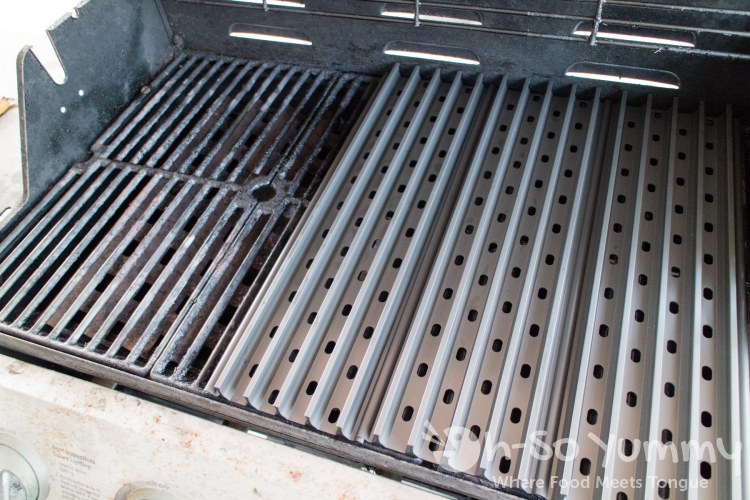
(GrillGrate on top)

(GrillGrate only)
You have the option to install them on top of your existing grates or you can replace your old ones altogether which is what I did. Each panel is 5.25" wide and is available in different lengths to suit your grill. You can even order half gap panels if needed. You can order the grills per your specs here: GrillGrate.com. Mine is a set of 5 with the length of 17.375 inch. One cool trick that you can do is flip over the GrillGrates so that the flat side is on the top. This allows you to cook smaller items that would normally fall between the grate valleys. Otherwise it also provides increased surface area contact for your food.
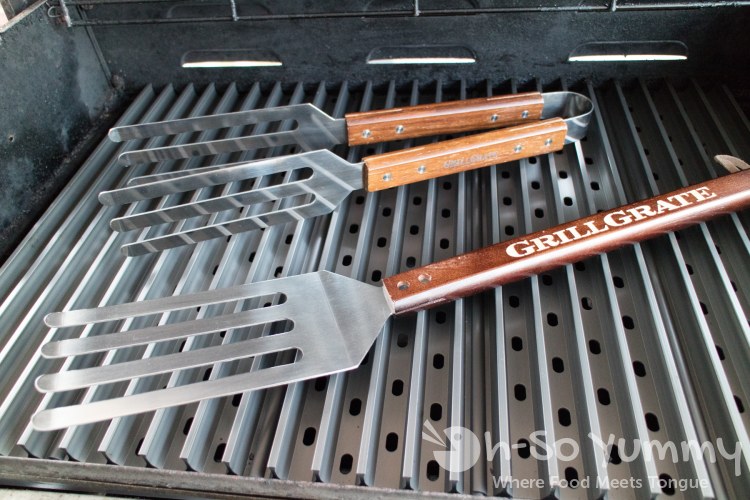
If you purchase the grates in a set you also get the GrateTool which is a fork-spatula hybrid. It is designed to fit exactly between the grate valleys so that you can easily lift your food off the grates. It works very well and double as a scrapper/clearner so that you can knock off any food debris that may have fallen down.
With this second set of GrillGrates I actually decided to buy the panels individually, skipping a second GrateTool, and instead purchasing the GrateTongs. I very much prefer the tongs as it makes handling and flipping food easier. I'm surprised that the GrillGrate website does not allow customers the option of choosing which type of tool you would like to include in your set.
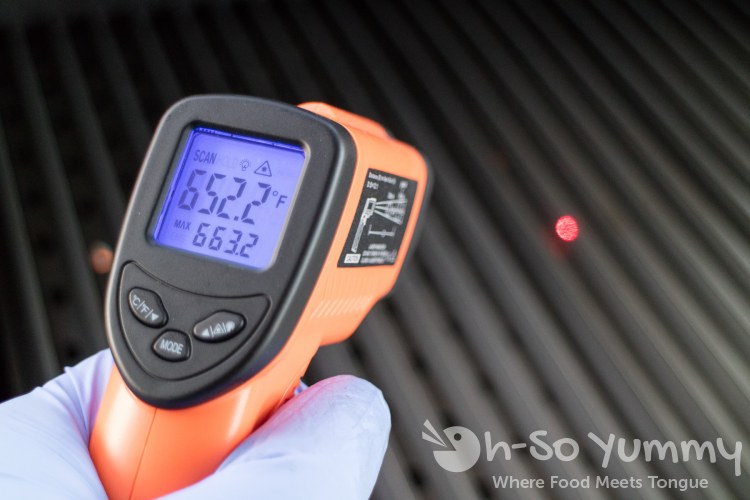
Depending on what kind of grill you are using (pellet, charcoal, gas) the GrillGrates can make your grill run hotter by 100 to 350 degrees Fahrenheit. Anyone using these for the first time should be aware and adjust their temperatures settings accordingly. For context, my gas grill would reach about 550 degrees when all four burners were set to high. With the GrillGrates in place, the temperature was able to reach 650 degrees within the same amount of time. If I had measured the temperature later on it probably would have read 700 degrees.
Testing out the GrillGrates

Here are the ribeye steaks that I purchased from Costco. They are 1.5 inches thick and come in at a little over a pound each. I like to season them simply with sea salt and cracked black pepper.
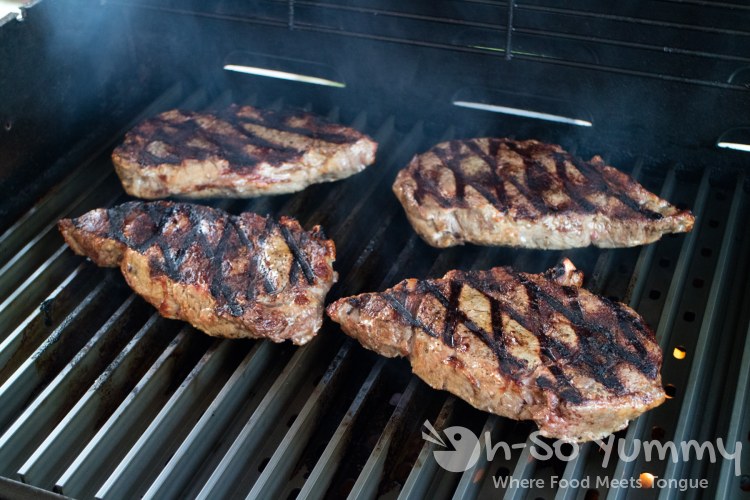
Before setting up the new replacement grates today I have been using my original GrillGrates exclusively on top of my old porcelain grates. I should have realized sooner that the temperature would be much higher when I had removed the porcelain grates and allowed the GrillGrates to sit directly above the burners. The ribeye steak had more prominent searing marks this time around.

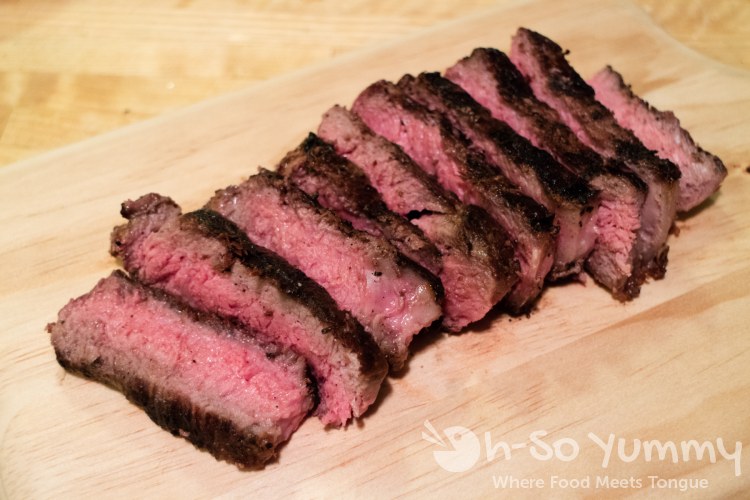
I removed the steaks from the grill when they reached an internal temperature of 127 degrees and allowed them to rest under a lightly tented sheet of aluminum foil. Even though I cooked the steaks at a higher temperature than what I would have normally done, it turned out pretty good! The inside was tender yet the outside had a nice crispy crust. Still, I'll try lowering the temperature next time as there is a bit more char than what I would have preferred.
Conclusion
I'm glad I purchased a full GrillGrates replacement set for my gas grill. It was a simple upgrade that will bring additional years of use to my grill. I'll continue to test different methods with each meat to find that perfect balance for this equipment. I just wish I had known about this product sooner!


Comments
Thanks for the thorough review! GrillGrate, Eat Well and Prosper!
Wow, thanks for the great info! This makes me want to become the next grill master.. or just a taste tester of all things grilled :)
Dennis, that meat looks incredible. I need this grill in my life.
thanks to dennis, it IS in my life. and yours when you come to visit! =D
Wow! You are like a scientist with your laser thermometer and precise measurements. You need a follow up in a year after your grill grates have been aged a bit. Looks like a great setup so far.
Add new comment